

Uplift iOS Interview
The Guide is for YOU if
- You are preparing for an iOS interview and want to improve your skills and knowledge and looking to level up your interview game and land your dream job.
- You want to gain confidence and ease during iOS interviews by learning expert tips and curated strategies.
- You want access to a comprehensive list of iOS interview QA to practice and prepare.
The introduction of SwiftUI has brought a fresh, new look to iOS app development. With its declarative syntax and improved performance, it’s no wonder that many developers are eager to make the switch. However, migrating from UIKit to SwiftUI can be a challenging process, especially if you have a large, complex app. In this blog post, we’ll discuss some workable strategies to help make your migration to SwiftUI as smooth as possible.
Is it time for your team to move to SwiftUI?
Ultimately, the decision to move to SwiftUI should be based on a careful evaluation of the unique needs and circumstances of your team and project.
- Familiarity with Swift: SwiftUI is built on Swift and assumes prior knowledge of the language, so it’s important that your team has experience with it.
- Project requirements: Consider the specific requirements of your project and whether SwiftUI is suitable for delivering those requirements. Let’s say your team also wants to implement a watch app with minimum effort.
- Resources: SwiftUI is still a relatively new framework, so consider whether your team has access to the training and support resources necessary to effectively use it.
- Team experience: Assess your team’s experience with iOS development and determine whether they have the skills necessary to transition to SwiftUI. Start early and start slow.
When to migrate existing apps from UIKit to SwiftUI from a product owner/manager perspective?
From a product owner/manager perspective, migration only makes sense if it provides a long-term benefit. Truth be told, In the short term, migration to SwiftUI will not bring major value to the app. From a product owner/manager perspective, it’s advisable to migrate existing apps from UIKit to SwiftUI when:
- The app requires new features or updates that can only be achieved efficiently with SwiftUI.
- The current UI design needs to be updated, and SwiftUI provides a more modern and user-friendly design.
- The app needs to be compatible with newer versions of iOS, as SwiftUI is the future of Apple’s development framework.
- Maintaining the current UIKit codebase is becoming more difficult and time-consuming, and a transition to SwiftUI can simplify the codebase.
It’s important to consider factors such as app complexity, development resources, and budget before making a decision to migrate.
Is SwiftUI production ready?
Yes. Some apps like Bumble and Uber have already started developing screens using SwiftUI. Further reading Debunk SwiftUI myth – Frequently asked questions
Why do I consider SwiftUI for the new UI feature instead of UIKit for our app?
Autolayout is very error-prone in some parts of our application, and fixing UI bugs is tedious. SwiftUI uses a declarative syntax, which makes it easier to read and understand the code. This also makes it easier to develop and maintain UI code. SwiftUI’s hot-reloading feature allows developers to see changes in real-time, reducing development time. Legacy UIKit code is harder to maintain and it needs refactoring.
Top reasons to migrate to SwiftUI
Here are some of the top reasons to consider migrating to SwiftUI:
- Improved User Experience: SwiftUI provides a modern, responsive, and user-friendly interface, making it easier to build and maintain attractive, user-friendly apps.
- Increased Productivity: SwiftUI streamlines the development process, allowing developers to build apps faster and with less code.
- Better Accessibility: SwiftUI makes it easier to implement accessibility features, ensuring that your apps are accessible to users with disabilities.
- Cross-Platform Support: With SwiftUI, it’s easier to build apps that run on multiple platforms, including iOS, iPadOS, macOS, watchOS, and tvOS.
- Simplified Maintenance: SwiftUI makes it easier to maintain your app’s code, as changes made in one place are automatically reflected in all parts of the app. Further reading Top 10 Pros and Cons of SwiftUI, SwiftUI vs UIKit – Benefits and Drawbacks of SwiftUI
Learning Curve
For developers with prior experience with UIKit, imperative syntax and traditional iOS app development, the learning curve for SwiftUI can be steeper, as it introduces a new paradigm for building user interfaces. However, for developers with less experience or those coming from other platforms, SwiftUI can be easier to learn and may have a shallower learning curve. Getting started with SwiftUI is simple, but mastering it requires time and effort. If you’re transitioning a project to SwiftUI or starting a new one with a team unfamiliar with the framework, it’s essential to allow for a ramp-up period in your project plan. My first SwiftUI app may have taken less time if built with UIKit, as I was learning along the way. However, after overcoming common challenges, I can say that I can now perform tasks faster with SwiftUI and prefer it over other options.
Top Challenges for migrating from UIKit to SwiftUI
Migrating from UIKit to SwiftUI can be a challenging process for experienced iOS teams that have been solely working on UIKit. Here are some of the top technical challenges that teams may face during this migration:
- Declarative vs Imperative programming SwiftUI uses a declarative programming approach, which is different from the imperative programming used in UIKit. Teams may need to adjust their mental models and familiarize themselves with the new paradigm, which can be a challenging process.
- Differences in architecture and layout SwiftUI uses a new layout system that is different from the Auto Layout system used in UIKit. Teams may need to re-learn how to lay out their views, as well as how to handle constraints and animations in SwiftUI.
- Learning a new API SwiftUI has a new API that is different from the UIKit API, so teams may need to take the time to learn the new API and familiarize themselves with the new framework.
- Lack of backwards compatibility SwiftUI does not have backwards compatibility with UIKit, which means that teams may need to rewrite their existing UIKit code in SwiftUI. This can be a time-consuming process, especially for larger apps.
- Interoperability limitations While SwiftUI and UIKit can work together, there are limitations to their interoperability. Teams may need to re-architect their existing UIKit code to work with SwiftUI, or they may need to find workarounds to use both frameworks together.
Some critical considerations before SwiftUI migration
SwiftUI, Apple’s new UI framework, has been making waves in the iOS development community. However, despite its popularity and ease of use, it’s important to consider the reasons why you might want to avoid SwiftUI migration for now/for at least a year.
Minimum iOS Version
One of the major drawbacks of SwiftUI is that it requires a minimum iOS version of 13. For many established apps, it is simply not possible to raise the minimum OS version.
Unavailable UI Components
Despite being a great framework, SwiftUI is still in its early stages, and not all common components are available yet compare to UIKit
Lack of Key Features
In some cases, SwiftUI components are missing crucial features compared to their UIKit equivalents. For example, the SwiftUI version of UITextField has no control over the keyboard return key, making it difficult to create forms with keyboard navigation. When you encounter a component that’s 90% complete but missing key features, you’ll have to wrap the UIKit component, which can be painful.
Evolving Framework
SwiftUI is still relatively new compared to UIKit. It’s worth noting that the framework is still evolving and there’s no guarantee of what may change or be removed as it matures. While the rate of change will slow down over time, it’s important to count on the risk and required effort.
Strategies for Migrating to SwiftUI
Start Small
One of the biggest benefits of SwiftUI is its ease of use. However, diving into a full-scale migration can be overwhelming. To avoid feeling overwhelmed, start by converting small, non-critical parts of your app to SwiftUI. This way, you can familiarize yourself with the new framework and gradually move on to more complex sections.
SwiftUI adoption model
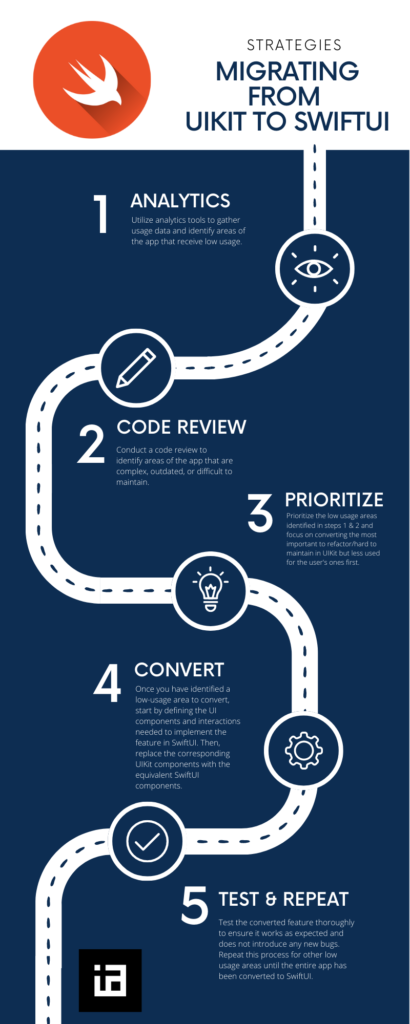
Here are some steps you can follow to identify low usage areas of your iOS app and convert them to SwiftUI from UIKit:
- Analytics: Utilize analytics tools to gather usage data and identify areas of the app that receive low usage.
- Code review: Conduct a code review to identify areas of the app that are complex, outdated, or difficult to maintain.
- Prioritize: Prioritize the low usage areas identified in steps 1 & 2 and focus on converting the most important to refactor/hard to maintain in UIKit but less used for the user’s ones first.
- Convert: Once you have identified a low-usage area to convert, start by defining the UI components and interactions needed to implement the feature in SwiftUI. Then, replace the corresponding UIKit components with the equivalent SwiftUI components.
- Test & Repeat: Test the converted feature thoroughly to ensure it works as expected and does not introduce any new bugs. Repeat this process for other low usage areas until the entire app has been converted to SwiftUI.
By focusing on low usage areas first, you can minimize the impact on users and reduce the risk of introducing instability to the app during the migration process.
Screen/UI component Analysis for migrating
| 1. High Screen/UI Component Usages, Low Legacy code/Easy to maintain UIKit Code | 2. High Screen/UI Component Usages, High Legacy code/Hard to maintain in UIKit |
| 3. Low Screen/UI Component Usages, Low Legacy code/Easy to maintain UIKit Code | 4. Low Screen/UI Component Usages, High Legacy code/Hard to maintain in UIKit Start here —> |
My suggestion to start with 4 then
4 -> 3 -> 2 ->1
Partial migration to SwiftUI
Partial SwiftUI migration is often a better approach for large apps compared to a complete migration from UIKit to SwiftUI for several reasons:
- Reduced Risk: Migrating only a portion of the app to SwiftUI at a time reduces the risk of introducing instability to the app, as any issues can be contained and resolved more easily.
- Gradual Adoption: A partial migration allows the development team to gradually adopt and get familiar with SwiftUI, reducing the learning curve and improving the overall quality of the migration.
- Better Resource Management: Migrating only a portion of the app at a time reduces the resource requirements and workload of the development team, making it easier to manage and prioritize tasks.
Feature flag for SwiftUI migration – How to gradually migrate SwiftUI in production?
Feature flags (also known as feature toggles or feature switches) can be useful in the context of a SwiftUI migration by allowing developers to gradually introduce and test new features in a controlled manner, without affecting the overall stability of the app. Here are a few examples of how feature flags can be used during a SwiftUI migration:
- Gradual Adoption: Feature flags can be used to gradually adopt SwiftUI in stages, without affecting the user experience. For example, you can use a feature flag to enable SwiftUI views in specific parts of the app and test them before rolling them out to all users.
- A/B Testing: Feature flags can be used to perform A/B testing, allowing you to test new features and user interfaces with a subset of users before rolling them out to all users.
- Rollback: If an issue is discovered during the migration process, feature flags can be used to quickly roll back to the previous version of the app without affecting the user experience.
- Feature Toggle: Feature flags can be used to toggle specific features on or off in the app, allowing you to control which features are available to users based on specific conditions.
By using feature flags, teams can adopt SwiftUI in a controlled and phased manner, reducing the risk of introducing instability and improving the overall quality of the app.
Keep an eye on minimum OS version
The decision to drop support for a minimum iOS version in the app should be based on a variety of factors, including user base, and revenue generated from those users.
If the percentage of users on an older iOS version is less than 2% and the revenue generated from those users is a low percentage of the overall revenue, it may be justified to drop support for that version to improve SwiftUI performance.
Use Interoperability
SwiftUI and UIKit can work together, making it easier to migrate existing UIKit-based code to SwiftUI. Take advantage of this interoperability by using UIKit components in your SwiftUI views and vice versa. This way, you can keep your existing code and make gradual changes, rather than starting from scratch.
Reuse existing UIKit components
You can reuse existing UIKit components in your SwiftUI views using UIViewRepresentable and UIViewControllerRepresentable. This allows you to keep your existing UIKit code while taking advantage of the benefits of SwiftUI.
Take advantage of Previews
SwiftUI includes a Preview feature in Xcode that lets you see how your views will look on different devices and screen sizes. This is a great way to quickly check that your views are rendering correctly and make changes if necessary.
Refactor Incrementally
Refactoring your code incrementally is a good approach when migrating to SwiftUI. Make small changes at a time and thoroughly test after each change to ensure everything is working correctly. This will help you avoid large-scale changes that can result in unexpected bugs and make it easier to diagnose and fix any issues that may arise.
Embrace Declarative Programming
SwiftUI uses a declarative programming approach, which is different from the imperative programming used in UIKit. To make the most of SwiftUI, it’s important to embrace this new approach and adopt it in your code.
Keep an Eye on Performance
SwiftUI is designed for performance, but it’s important to monitor it and optimize when necessary. Keep an eye on your app’s performance during the migration process and make changes to improve it when necessary.
Migrating from UIKit to SwiftUI – UI Component Level Migration
If you are familiar with UIKit, you may find it easy to transition to SwiftUI as many of the UI components you are familiar with have equivalent components in SwiftUI. Here is a list of common UIKit components and their SwiftUI equivalents:
- UILabel: Equivalent in SwiftUI is Text.
- UISwitch: Equivalent in SwiftUI is Toggle.
- UISlider: Equivalent in SwiftUI is Slider.
- UIButton: Equivalent in SwiftUI is Button.
- UITextField: Equivalent in SwiftUI is TextField.
- UITextField with isSecureTextEntry set to true: Equivalent in SwiftUI is SecureField.
- UITextView: Equivalent in SwiftUI is TextEditor.
- UIStepper: Equivalent in SwiftUI is Stepper.
- UISegmentedControl: Equivalent in SwiftUI is Picker.
- UIImageView: Equivalent in SwiftUI is Image.
- UIStackView with horizontal axis: Equivalent in SwiftUI is HStack.
- UIStackView with vertical axis: Equivalent in SwiftUI is VStack.
- UITableView: Equivalent in SwiftUI is List.
- UICollectionView: Equivalent in SwiftUI is LazyVGrid and LazyHGrid.
- UINavigationController: Equivalent in SwiftUI is NavigationStack or NavigationSplitView.
- UIAlertController with style .alert: Equivalent in SwiftUI is Alert.
- UIAlertController with style .actionSheet: Equivalent in SwiftUI is ActionSheet.
- UIDatePicker: Equivalent in SwiftUI is DatePicker.
- UIProgressView: Equivalent in SwiftUI is ProgressView with a value.
- UIActivityIndicatorView: Equivalent in SwiftUI is ProgressView without a value.
- NSAttributedString: Not compatible with SwiftUI, use Text instead
Note that while the SwiftUI components have similar functionality to their UIKit counterparts, they may have subtle differences in their implementation. It is important to familiarize yourself with the SwiftUI components and their documentation to effectively use them in your projects.
Converting Storyboard to SwiftUI Views
- Gradually replace parts of the UI: As you gain more experience with SwiftUI, you can gradually replace parts of the Storyboard UI that are easier to convert.
- Use a hybrid approach: You can mix and match SwiftUI and UIKit/Storyboard views, allowing you to leverage the strengths of both technologies.
- Test thoroughly: Ensure that your app continues to work as expected by thoroughly testing both the migrated parts and the parts that have not been migrated.
- Update documentation and training: Update your documentation and training materials to reflect the changes made to the app.
Can you mix UIKit and SwiftUI?
Yes. The UIViewRepresentable protocol enables the integration of UIKit views into the SwiftUI framework if needed by establishing a bridge between UIKit and SwiftUI’s declarative view design.
Integrating UIKit into SwiftUI
The integration of UIKit into SwiftUI can be achieved through the use of UIHostingController. This enables the integration of SwiftUI views into the UIKit framework. On the other hand, integrating views or view controllers from the UIKit world into SwiftUI is also possible and may be necessary in certain scenarios. For instance, linking to a UIKit view controller from within SwiftUI to facilitate navigation or incorporating a view controller or view from the UIKit world into a SwiftUI view. Currently, not all UI controls available in UIKit have an equivalent in SwiftUI. An example of this is the UIActivityViewController which is used for sharing content from an app.
To address this issue, SwiftUI provides the UIViewRepresentable and UIViewControllerRepresentable protocols. These protocols allow UIKit views and view controllers to be made compatible with SwiftUI, enabling their integration into the framework.
Migrate entry Point and Navigation Controller from UIKit to SwiftUI
During the migration process of an iOS/iPadOS app, the requirement to migrate the initial view controller may arise, necessitating modification of the application’s entry point. The same scenario applies if the transition from UIKit’s NavigationController to SwiftUI’s NavigationView is to be made.
The entry point is governed by the app lifecycle management system, which has undergone changes in previous iOS/iPadOS releases. iOS/iPadOS 12 monitored the app lifecycle via the AppDelegate, while in version 13, the SceneDelegate was added to support multiple windows in addition to the AppDelegate. However, SceneDelegate remains part of the UIKit framework. With the release of iOS 14, a new SwiftUI-based app lifecycle management system was introduced, eliminating the requirement for SceneDelegate and AppDelegate. However, this new solution has limitations and requires an increase in the deployment target to iOS/iPadOS 14.
As iOS/iPadOS 14 was recently released, this article will utilize the solution compatible with version 13, which leverages SceneDelegate lifecycle management.
In conclusion, migrating from UIKit to SwiftUI can be a challenging process, but with the right approach, it can be a smooth and rewarding experience. Start small, take advantage of interoperability, reuse existing UIKit components, take advantage of Previews, refactor incrementally, embrace declarative programming, and keep an eye on performance to ensure a successful migration.
✍️ Written by Ishtiak Ahmed
👉 Follow me on X ● LinkedIn
Get Ready to Shine: Mastering the iOS Interview
Enjoying the articles? Get the inside scoop by subscribing to my newsletter.
Get access to exclusive iOS development tips, tricks, and insights when you subscribe to my newsletter. You'll also receive links to new articles, app development ideas, and an interview preparation mini book.